Classroom technology
Classrooms
The library offers three bookable spaces for digital learning and collaboration.

Connecting
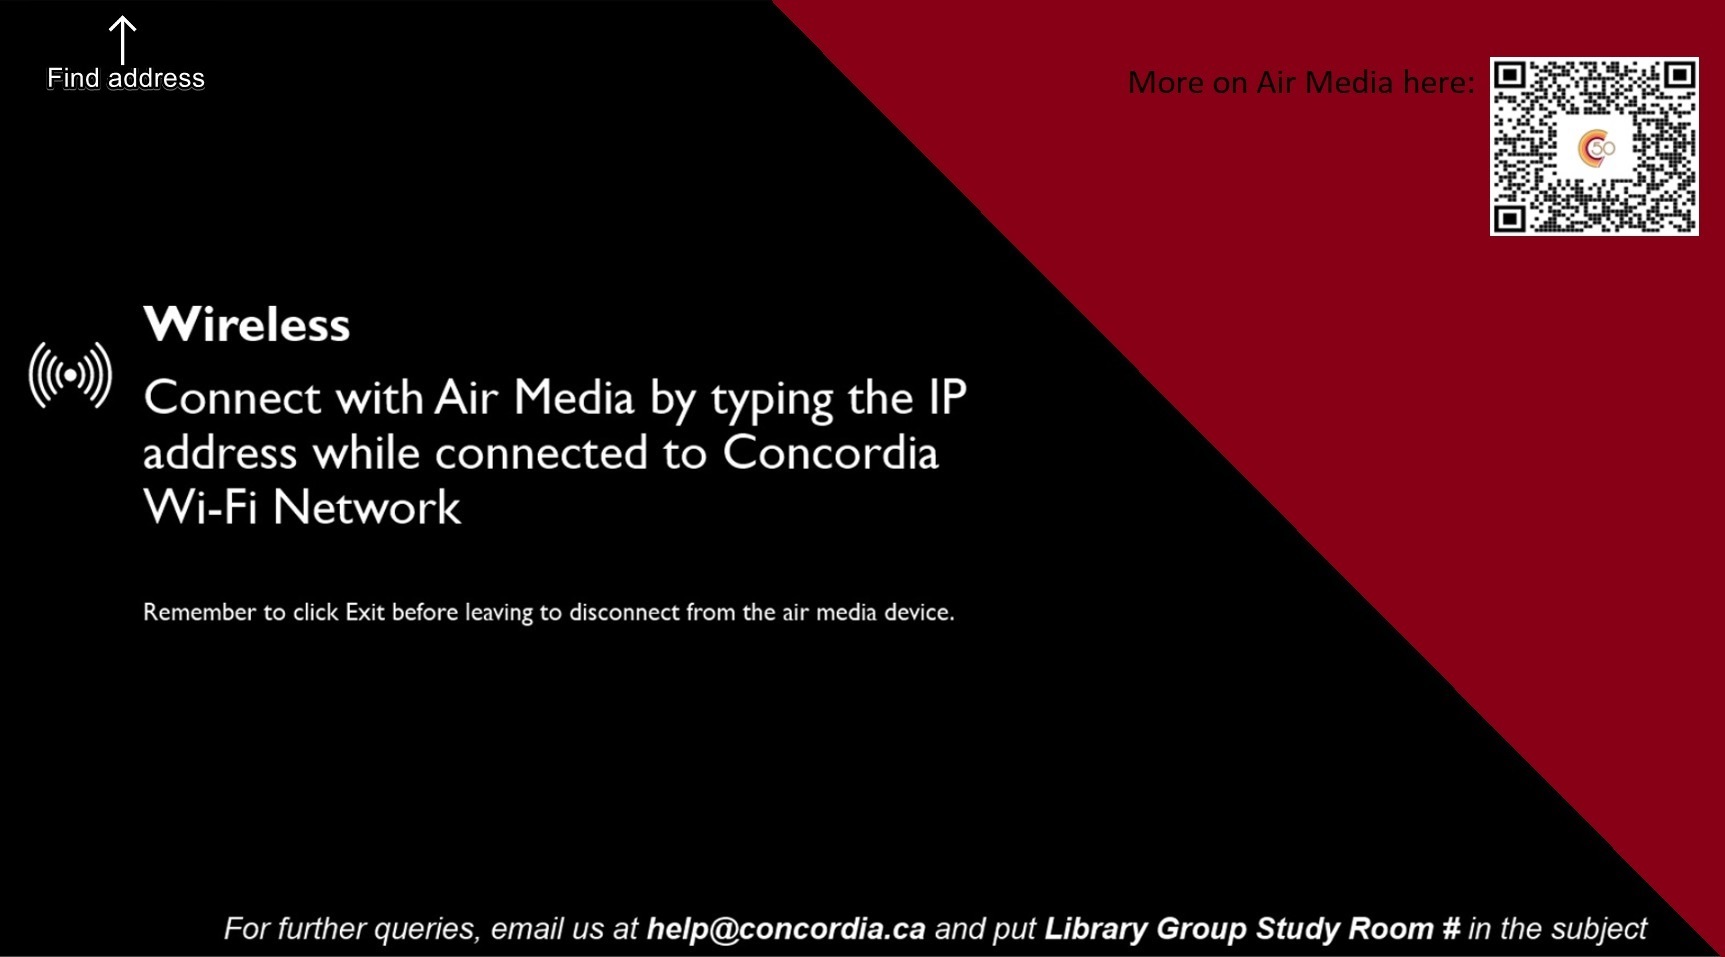
Devices may be connected to the screens wirelessly using AirMedia.

Desktop and laptop
- Enter the IP address displayed at the top of the AirMedia screen into a browser.
- This will prompt you to download the AirMedia app.
- Double click the downloaded file to run it.
- Enter the code from the right of the screen (digits).
Mobile
When using a mobile device, only certain document types, images and web browsing can be shared.
- Download the Crestron AirMedia app (if you are using a Concordia iPad, the app is already present in the communication folder).
- Connect using the same IP address/code combination as above.
*Troubleshooting* If the mobile app seems connected but nothing from the devices appears on the screen, quit the app completely and restart it.
More device-specific instructions are available on our Group study room technology page.

Projection

Note: Use of two projectors applies to Multifunctional Room only.
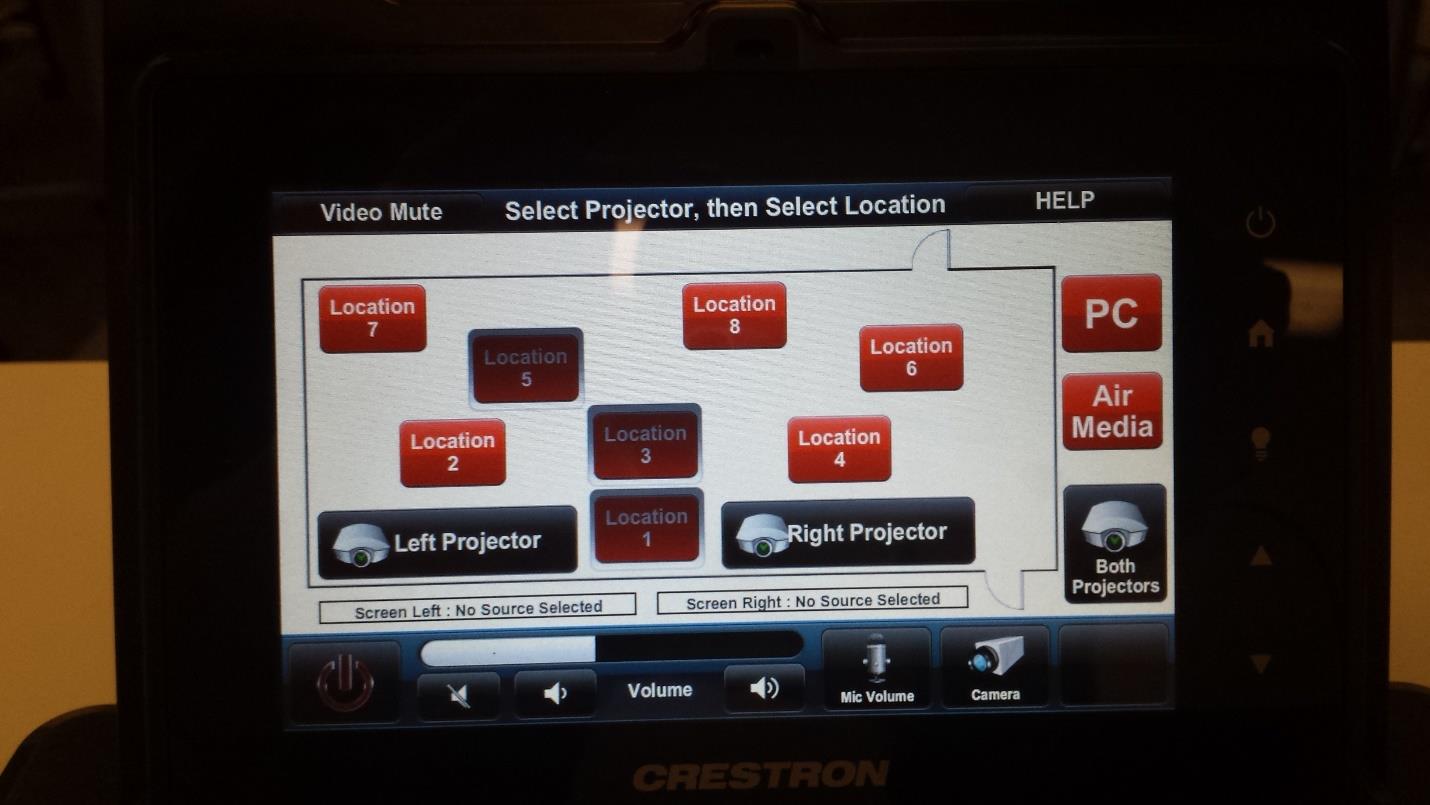
- Touch anywhere on the small touch screen to activate it.
- Select a destination (left, right or both projectors) and a source (PC, AirMedia or a location); the projector screen(s) will automatically roll down.
Sources
- The PC
- External device (laptop, tablet or phone) connected either by wire or wirelessly
PC
- Move the mouse or touch the keyboard to turn on the monitor at the teacher’s station.
- Log in to the PC with your NetName and password.
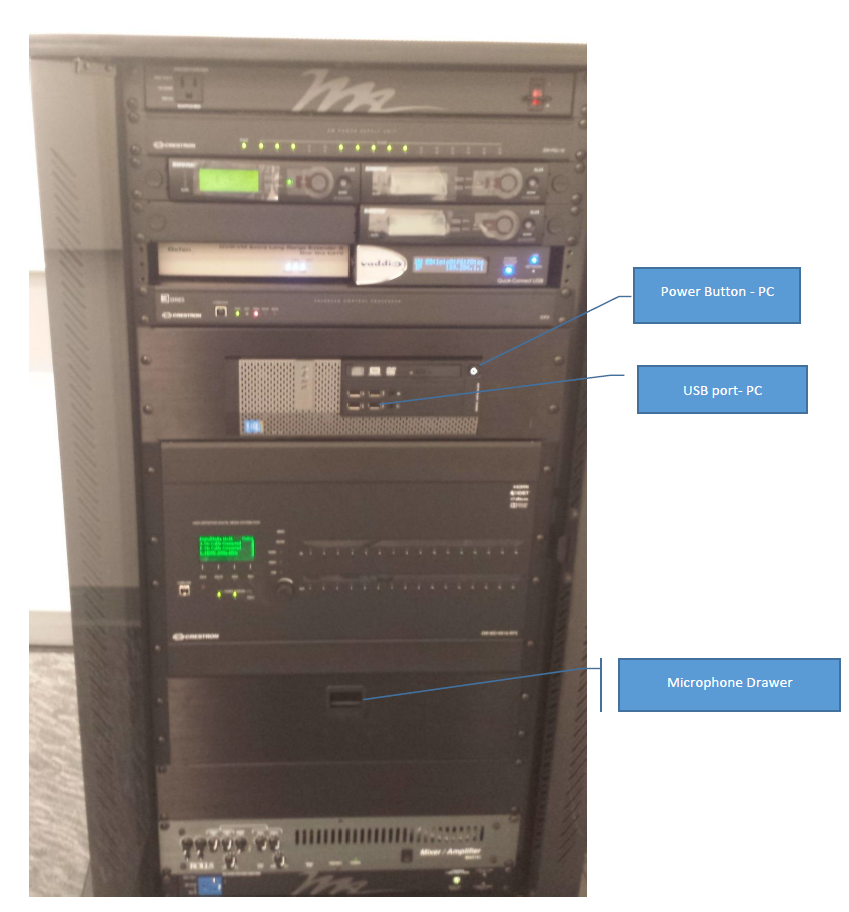
- If the screen doesn’t come on the monitor at the teacher’s podium, verify that the power is on by looking at the DELL tower in the credenza.
- When you are done using the PC, log out. Do not shut down the PC.

Wired connection
- Select the appropriate floor monument number (where the teacher’s podium is connected to the power and data in the floor).
- Use one of the cables located bellow the touch panel to wire in your device.
Wireless connection
- Select AirMedia as your source and follow the instructions that come up on the projector you select.
Sources
- Single source for both projectors: Select the “Both Projectors” icon on the right of the screen then touch the source you want to project (either the PC or AirMedia).
- Different source for each projector: Select the left or right (measured with your back to the projectors) projector and then the source.

Camera
There is a high definition camera connected to the PC of the teacher’s podium.

- Select the camera icon on the touch screen.
- Adjust the angle of the camera and/or zoom in and out.
Use any application that is designed to handle direct input from a camera, for example Zoom, Teams, or Hangouts, to create a live video stream.

Sound
Note: Applies to Multifunctional Room only.
Microphones are available in the drawer of the large black credenza in the front far corner of the classroom.
- 2 handheld microphones
- 1 lapel microphone (for streaming, not amplifying your voice; since it captures sound from all directions, it may lead to feedback*.)
Get started
- Power on the microphone. To hear sound, the touch screen on the teacher’s podium must be activated.
- Select the microphone icon to adjust volume. Be cautious of feedback, do not turn the volume up too high.
- When finished, power off the microphone and return it to the drawer.
*Feedback: Mute the microphone immediately if there is feedback (press the power button on the transmitter or mute on the teacher’s station touch screen under mic volume).

Lights
- Locate the controls on a wall near the classroom door.
- Press the on/off switch.
- Adjust brightness with the row of buttons.
For optimal use with the projectors, choose a setting in the middle range.

Podium
Multiple locations possible.


